

STEPS TO INSTALL KALI IN VMWARE
Requirements:
- Download and install Virtual machine like vmware or virtualbox .
- Download kali ISO
Installation Process
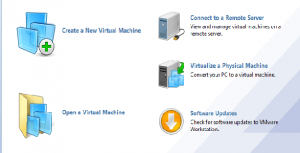
Step1: Open vmware player,click on “create virtual machine”.
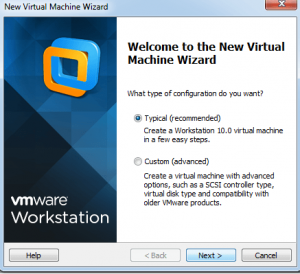
Step2: Mount ISO image and Select Guest Operating System Linux/ubuntu.

Step3: Virtual machine name and location.
Step4: Setup disk space(20gb is great, but comfortable with 12gb).

Step5: Cross check hardware configuration and start the virtual machine.

Step6: Select Graphical install and select your preferred language.

Step7: On the next screen, select your location and standard keymap keyboard.


Step8: After this it will take sometime for detecting our hardwares.
Step9: select Do not configure the network at this time and hit next.

Step10: We need to supply a hostname, which is a type computer name. We can enter anything or We can just leave it as kali and hit Continue.

Step11: Now we need to set password for root user, this is very important. if password lost then the only option is to reinstall again.

Step12: The next step will ask you to select timezone, select and continue.
Step13: Wait until kali detects disk partitions.When you are presented with the next step, select Guided – use entire disk.

Step14: Now installer will now confirm that you want to use this partition. Hit Continue.

Step15: Best to select All files in one partition for new users.

Step16: Confirm changes by selecting Finish partitioning and write changes to disk.

Step17: Confirm changes to be written in disk, select radio button yes and continue.

Now Kali deployment started! Wait until it has completed, this might take 20 minutes.
Step18: Alright now installation completed and we asked to Network mirror. You can just click now and continue.

Step19: In few minutes installer will ask you if you want to install GRUB boot loader. Click Yes and Continue.

Step20: Now installation completed with a notification.Hit Continue.

Step21: After restart, and kali takes you to “login” screen, click on “Other”.
Step22: Enter username root in the box and press Enter or click “Log In,”On the next screen, enter password which we created earlier, and press Enter.


That’s all folks we are done.. Happy hacking!!!


Nice article was looking for a screen shot illustrated installation steps. Great work !
[…] 9.Stand up a website on Windows/IIS 10.Stand up a website on PHP 11.Build a blog on WordPress 12.Have a Kali Linux installation always ready to go 13.Build an OpenBSD box and create a DNS Server using DJBDNS 14.Set up a proxy server 15.Build and […]